Usage
Warning
Remember to source your workspace with . install/local_setup.bash
Opening
You have the option of Running RQt Image Overlay as either a:
Standalone Application
RQt Widget
Open a new terminal and run RQt:
rqt
Warning
If this is the first time opening rqt since you’ve sourced the setup file, run
rqt --force-discover instead.
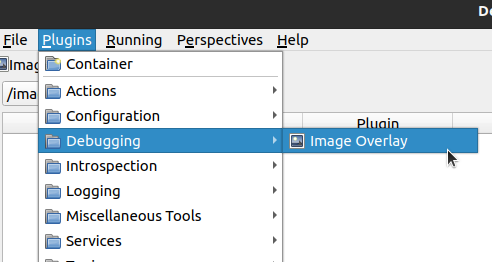
From the menu bar, select Plugins > Debugging > Image Overlay:
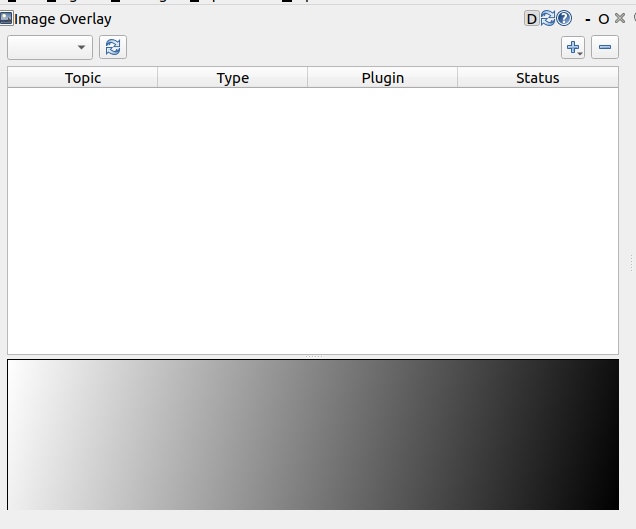
You should see a dockable widget show up like the following:
Open a new terminal and run the application:
ros2 run rqt_image_overlay rqt_image_overlay
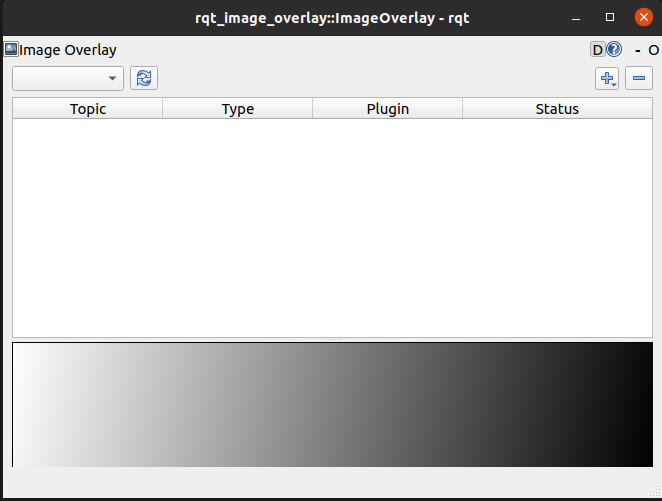
You should see a standalone application show up in RQt like below:
Publishing Images
You need a node that publishes images on a topic to display. Publish images on a topic using one of the following:
V4L2 Node - Recommended, only works if you have a webcam
Image Publisher Node
Your own node that publishes images on any topic
In this option, you will use the v4l2_camera package to publish images from your webcam. To install the package, run:
sudo apt install ros-${ROS_DISTRO}-v4l2-camera
Tip
${ROS_DISTRO} gets automatically substituted with the name of your ROS2 distro
(eg. rolling, galactic, etc.) if you have sourced your ROS2 installation.
To start the v4l2 camera node, run:
ros2 run v4l2_camera v4l2_camera_node
In this option, you will use the image_publisher package to publish an image file onto a topic. To install the package, run:
sudo apt install ros-${ROS_DISTRO}-image-publisher
Before starting the image publisher node, you must have an image to publish.
In this example, we use an image called test.png in the home directory (ie. ~/test.png).
Replace this with the path to your image file.
To start the image publisher node, run:
ros2 run image_publisher image_publisher_node ~/test.png
Displaying the Images
Tip
In a separate terminal, check that the image is being published correctly by running:
ros2 topic list -t
Make sure /image_raw [sensor_msgs/msg/Image] shows up in the list of topics.
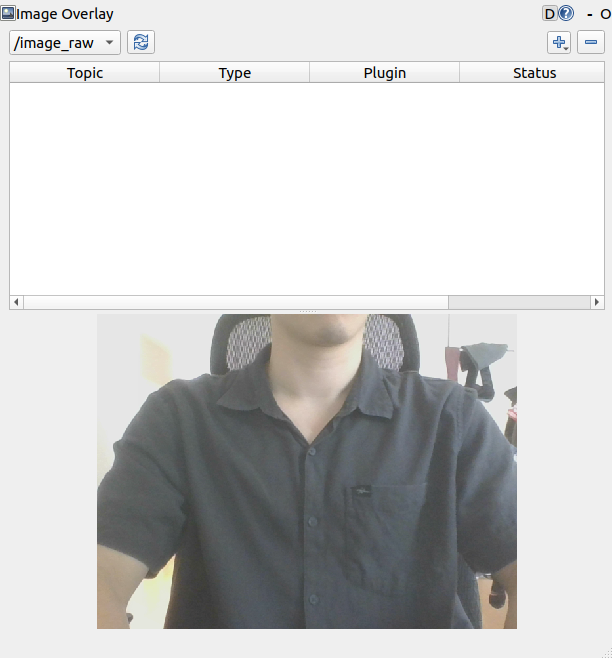
Go to the window with the RQt Image Overlay that you opened in the Opening section.
Click on the refresh button to update the list of image topics. Opening the drop-down, you should see all topics detected
publishing sensor_msgs/Image. In this example, /image_raw is the only topic listed.
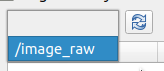
Select the topic /image_raw, you should see the output of your webcam showing in the
bottom half of your RQt Image Overlay, as below:
What’s next?
Next, you must create a layer to display your message type. Continue onto Creating a Layer.