Creating a Layer
In this tutorial, you will create a layer that draws a published geometry_msgs::Point onto a published image. The instructions are similar to the Creating and Using Plugins (C++) tutorial.
See also
Examples for more examples of packages implementing the layer.
1. Create a Package
Create a new empty package in your workspace src directory:
ros2 pkg create geometry_msgs_layers --build-type ament_cmake --dependencies rqt_image_overlay_layer geometry_msgs --library-name point_layer
The command:
Created a package called geometry_msgs_layers
Added code to CMakeLists.txt of the new package, to generate a library called point_layer
Generated files
include/geometry_msgs_layers/point_layer.hppandsrc/point_layer.cpp
2. Write point_layer.hpp
Open the generated include/geometry_msgs_layers/point_layer.hpp file in your favorite editor,
and paste the following instead of it:
#ifndef GEOMETRY_MSGS_LAYERS__POINT_LAYER_HPP_
#define GEOMETRY_MSGS_LAYERS__POINT_LAYER_HPP_

#include "geometry_msgs_layers/visibility_control.h"
#include "rqt_image_overlay_layer/plugin.hpp"
#include "geometry_msgs/msg/point.hpp"

namespace geometry_msgs_layers
{

class PointLayer : public rqt_image_overlay_layer::Plugin<geometry_msgs::msg::Point>
{
protected:
  void overlay(
    QPainter & painter,
    const geometry_msgs::msg::Point & msg) override;
};

}  // namespace geometry_msgs_layers

#endif  // GEOMETRY_MSGS_LAYERS__POINT_LAYER_HPP_
Your PointLayer class must inherit the class rqt_image_overlay_layer::Plugin<T> where T is the msg
type you are displaying in the layer (ie. geometry_msgs::msg::Point).
3. Write point_layer.cpp
Open the generated src/point_layer.cpp file in your favorite editor, and paste the following
instead of it:
#include <QPainter>
#include "geometry_msgs_layers/point_layer.hpp"

namespace geometry_msgs_layers
{

void PointLayer::overlay(
  QPainter & painter,
  const geometry_msgs::msg::Point & msg)
{
  painter.translate(msg.x, msg.y);

  painter.save();
  QPen pen = painter.pen();
  pen.setCapStyle(Qt::RoundCap);
  pen.setWidth(20);
  painter.setPen(pen);
  painter.drawPoint(0, 0);
  painter.restore();

  painter.translate(-30, -20);
  QString str = "(%1, %2)";
  painter.drawText(0, 0, str.arg(msg.x).arg(msg.y));
}

}  // namespace geometry_msgs_layers

#include "pluginlib/class_list_macros.hpp"

PLUGINLIB_EXPORT_CLASS(geometry_msgs_layers::PointLayer, rqt_image_overlay_layer::PluginInterface)
The implementation of point_layer.cpp consists of drawing a black point and drawing the coordinate as text above it.
The arguments to the PLUGINLIB_EXPORT_CLASS macro, are:
The fully-qualified type of the layer class, in this case, geometry_msgs_layers::PointLayer.
The fully-qualified type of the base class, this is always rqt_image_overlay_layer::PluginInterface
Important
The base class is rqt_image_overlay_layer::PluginInterface, which is a
non-templated in-direct parent class.
The direct parent class rqt_image_overlay_layer::Plugin<T> cannot be a base
class for plugins because it is a template class.
4. Plugin Declaration XML
A Plugin Declaration XML file must be created to store meta-data about the package.
In the package, create plugins.xml with the following code:
<library path="point_layer">
  <class type="geometry_msgs_layers::PointLayer" base_class_type="rqt_image_overlay_layer::PluginInterface">
    <description>This is an rqt_image_overlay layer for geometry_msgs::Point</description>
  </class>
</library>
Tip
See Plugin Declaration XML from the official ROS2 tutorials to get familiar with the XML tags.
5. CMake Plugin Declaration
CMake Plugin Declaration is required file for the package to be recognised as an rqt_image_overlay_layer plugin.
In your package’s CMakeLists.txt, add the pluginlib_export_plugin_description_file line after
the existing ament_target_dependencies line as follows:
ament_target_dependencies(
  point_layer
  "rqt_image_overlay_layer"
  "geometry_msgs"
)

pluginlib_export_plugin_description_file(rqt_image_overlay_layer plugins.xml)
Important
The first argument to pluginlib_export_plugin_description_file (ie. rqt_image_overlay_layer)
is the plugin category your layer belongs to, not the name of your layer.
6. Build and Run
Navigate back to the root of your workspace, and build your new package:
colcon build --packages-select geometry_msgs_layers
In a new terminal, source your workspace, and either run rqt, or rqt_image_overlay:
ros2 run rqt_image_overlay rqt_image_overlay
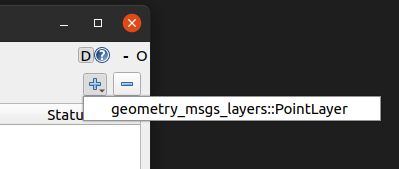
You should be able to see your new layer when you go to add a layer, as following:
7. Testing
In a fresh terminal, publish a point (100.0, 200.0) on topic point by running:
ros2 topic pub point geometry_msgs/msg/Point "
x: 100.0
y: 200.0
z: 0.0"
In rqt_image_overlay, add a geometry_msgs_layer::PointLayer, and set the image topic and
set the plugin’s topic to point. You should see the point layer over the image, as below:
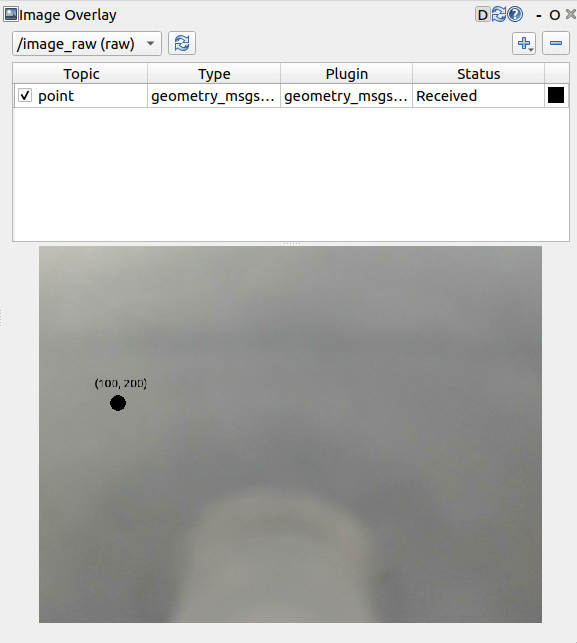
Congratulations! You now know how to visualize any custom ros msg topic onto an image!